Publish to Huawei Quick Games
Environment Configuration
Download Huawei Quick APP Loader and install it on your Android device (Android Phone 6.0 or above is recommended)
Install nodejs-8.1.4 or above, globally.
Release Process
Use Cocos Creator to open the project that needs to be released. Select Huawei Quick Game in the Platform dropdown of the Build... panel.

The specific filling rules for the relevant parameter configuration are as follows:
App Package Name
App Package Name is filled in according to the user's needs. It's required.
App Name
App Name, the name of the Huawei Quick Game, is required. And the Title at the top of the Build panel does not participate in the Huawei Quick Game packaging process.
Desktop Icon
Desktop Icon is required. Click the ... button at the back of the input box to select the icon you want. When building, the Desktop Icon will be built into the Huawei Quick Game project. Desktop Icon suggest using PNG pictures.
App Version Name
This item is required. App Version Name is the real version, such as: 1.0.0.
App Version Number
This item is required. App Version Number is different from the App Version Name, and the App Version Number is mainly used to distinguish the version update. Each time when you submit audit, the App version number is at least 1 higher than the value of the last submitted audit. It must not be equal to or less than the value of the last submitted audit, and it is recommended that the App Version Number be recursively incremented by 1 each time when the audit is submitted. Note: The App Version Number must be a positive integer.
Supported Minimum Platform Version Number
This item is required. According to the requirements of Huawei Quick Games, this value must be greater than or equal to 1035 at present.
Custom manifest file path (optional)
This is an optional item, which is the expansion function of Huawei Quick Game. When you use it, you need to select a json file, and the data type in the file is required to be in json format. Note: The json data is not available when the key value are
package,appType,name,versionName,versionCode,icon,minPlatformVersion,config,display, otherwise it will be overwritten by data such as App Package Name, App Name, Desktop Icon, App Version Name, pp Version Number during the build.Small Packet Mode
This item is optional. The in-package volume of the quick game contains code and resources that cannot exceed 10M, and resources can be loaded via network requests. Small Packet Mode is to help users keep the script files in the quick game package, other resources are uploaded to the remote server, and downloaded from the remote server as needed. And the download, cache and version management of remote resources, Cocos Creator has already helped the user. What the user needs to do is the following steps:
When building, check the Small Packet Mode and fill in the Small Packet Mode Server Path.
First game resource package into the game package, this item is optional (New in v2.1.3).
In the Small Packet Mode, due to too many resources on the launch scene, downloading and loading resources for a long time may result in a short black screen when entering the game for the first time. If First game resource package into the game package is checked, you can reduce the black screen time when you first enter the game. However, it should be noted that the
res/importresource does not support split resource downloading at this time, and the entireimportdirectory is also packaged into the first package.Developers can choose whether to check this item according to their needs. Then click on Build.
After the build is complete, click the Open button after the Build Path to upload the huawei/res directory under the release path to the packet mode server. For example, if the default publishing path is build, you need to upload the build/huawei/res directory.
At this point, the res directory will no longer be included in the built-up rpk, and the resources in the res directory will be downloaded from the filled Small Packet Mode Server Path through the network request.
Keystore
When you check the Keystore, the default is to build the rpk package with a certificate that comes with Creator, which is used only for debugging. Note: When the rpk package is to be used to submit an audit, do not check the Keystore to build it.
If you don't check the Keystore, you need to configure the signature files certificate.pem path and private.pem path, where you build a rpk package that you can publish directly. The user can configure two signature files by using the ... button to the right of the input box. Note: These two signature files are not recommended to be placed in the build/huawei directory of the publish package, otherwise the build directory will be emptied each time when it is built, resulting in file loss.
There are two ways to generate a signature files:
Generated by the New button after the certificate.pem path in the Build panel.
Generated by the command line.
The user needs to generate the signature file private.pem, certificate.pem through tools such as openssl.
# Generate a signature file with the openssl command tool openssl req -newkey rsa:2048 -nodes -keyout private.pem -x509 -days 3650 -out certificate.pemNote: openssl can be opened directly in the terminal in Linux or Mac environment, and in the Windows environment you need to install
openssland configure system environment variables. Restart Creator after the configuration is complete.
Custom node folder path
This item is optional. Starting with v2.0.10, the global node of the operating system can be automatically obtained and without manual setting. The way to obtain node is:
- Windows: Gets the path in the environment variable from the system.
- Mac: Gets the path in the environment variable from the configuration file of Shell.
If not, make sure the node is properly installed and can be started directly in the command line environment. The obtained node is used to provide an environment for building rpk.
The node filling rules below v2.0.10 are as follows:
- If you do not fill out this item, the Creator will read the node path in the environment variable by default on the Windows system, and the node in the /usr/bin/local directory is read by default on the Mac system to build the exported quick game rpk package that can be run.
If your PC environment does not have node installed or cannot read the node path in the system, you will need to fill out the Custom node folder path to build and exported rpk package. Fill in the rules as follows:
Windows system
# Get local node folder path
where node
# If the output is
C:\Program Files\nodejs\node.exe
# Then the local node folder path is filled in as:
C:\Program Files\nodejs
Mac system
# Get local node folder path
which node
# If the output is
/Users/yourname/.nvm/versions/node/v8.1.4/bin/node
# Then the local node folder path is filled in as:
/Users/yourname/.nvm/versions/node/v8.1.4/bin
2. Build
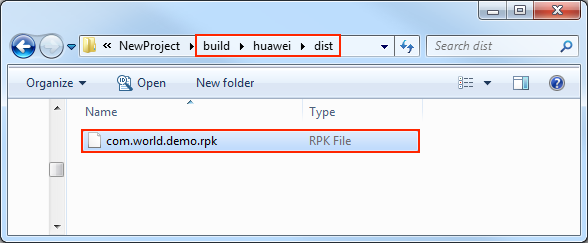
After the relevant parameters of the Build panel are set, click Build. After the build is complete, click the Open button behind the Build Path to open the build release package. You can see that the huawei directory is generated under the default release path build directory, which is the exported Huawei Quick Game project directory and rpk, rpk package are in the /build/huawei/dist directory.
3. Run the built rpk to the phone. There are two ways:
Click the Play button in the bottom right corner of the Build panel to bring up a QuickGame DevTools panel. Select the Android device in the Phone Lists column (if multiple Android devices are connected), and then click the Run button in the QuickGame DevTools column.
At this time, rpk will be pushed to the previously installed Huawei Quick APP Loader (If there is a permission box, please click allow), and then rpk can be opened on the Android device.

Copy the rpk package generated by the build to the sdcard directory of the Android device. Open the Huawei Quick APP Loader that has been installed before, clicking the back button on the Android device will bring up a list, select the Local Install, select the path of place rpk, and then you can run the rpk on the Android device.
4. Subpackage rpk
Subpackage rpk can be used according to your needs.
Subpackage loading, that is, splitting the game content into several packages according to certain rules, only downloading the necessary packages when starting up for the first time. This necessary package is called main package. And the developer can trigger in the main package to download other sub-packages, which can effectively reduce the time spent on the first boot. To use this function, you need to set Subpackage Configuration in Cocos Creator, and the package will be automatically subpackaged when the setting is completed.
After the build is complete, the generated subpackages and main package are merged into one rpk, which is in the /build/quickgame/dist directory.